Working with Subassemblies
If any assembly is still loaded in Pro/ENGINEER close the current window with Window > Close and erase all models with File > Erase > Not Displayed.
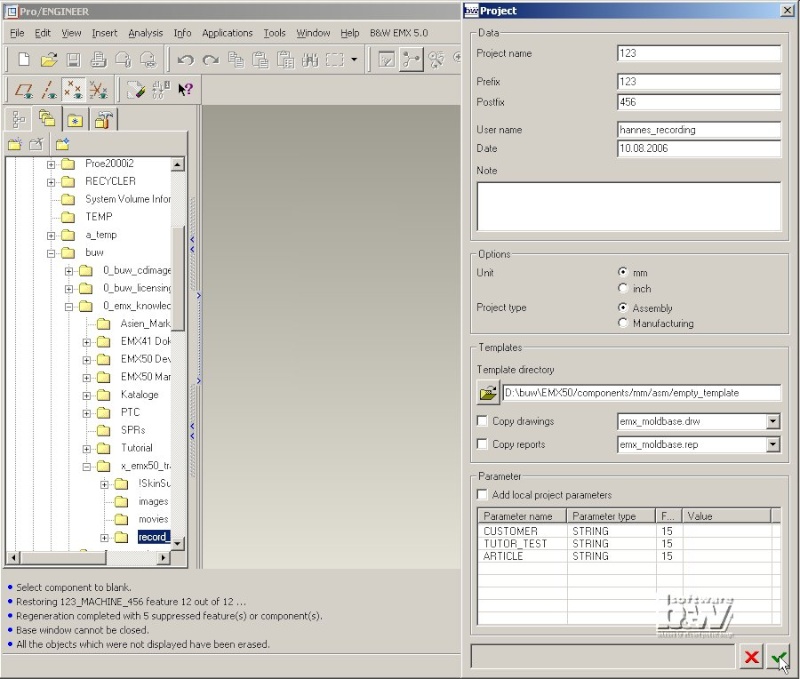
Create new EMX project
Press EMX > Project > ...create new.
Leave all settings to default and deactivate Copy drawings, Copy reports and Add local project parameters.
Press .
Add two Subassemblies
Press EMX > Mold Base > Assembly Definition.
Select File > Add subassembly in Moldbase Definition.
Enter Name 123_FIX_HALF.
Click Copy drawings and Copy reports to deactivate them.
Press in Subassembly dialog box.
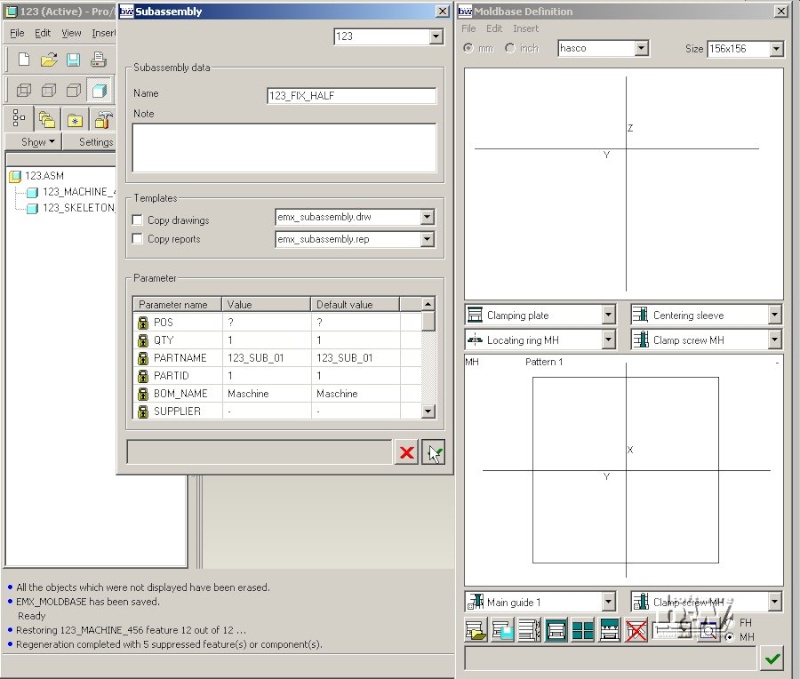
A new subassembly 123_FIX_HALF.ASM is added in the 3D assembly. The skeleton model will be added automatically in this subassembly.
Select File > Add subassembly in Moldbase Definition.
Enter Name 123_MOVING_HALF.
Click Copy drawings and Copy reports to deactivate them.
Press in Subassembly dialog box.
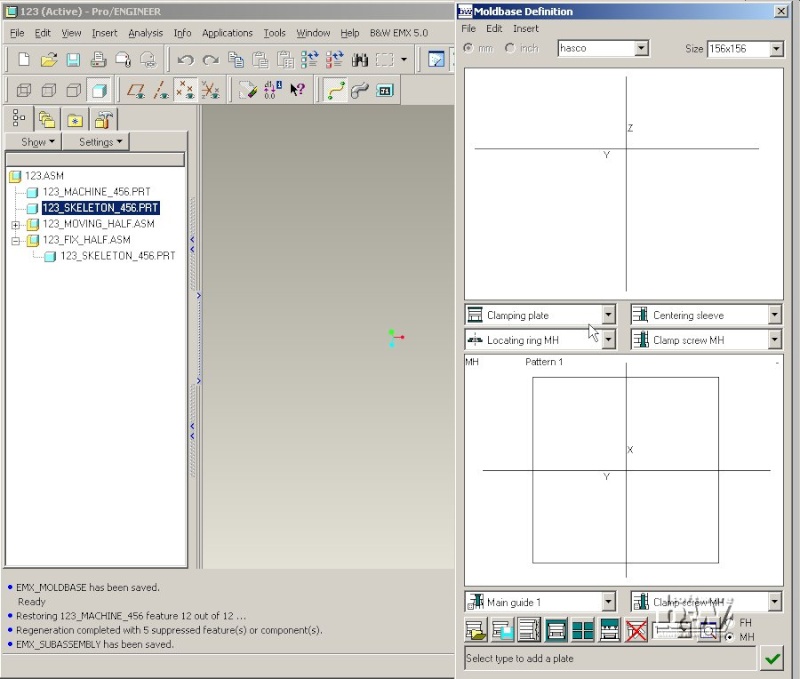
Note: New subassemblies are placed behind the main assembly skeleton model in the model tree by default. So the second subassembly 123_MOVING_HALF.ASM is above the first subassembly 123_FIX_HALF.ASM. Their order can be modified in the Pro/ENGINEER Model Tree without problems.
Add a plate in a subassembly
Select Clamping plate from the plate list in Moldbase Definition.
Click below the splitting plane in side view.
Select 123_MOVING_HALF from the top right list in the Plate dialog box.
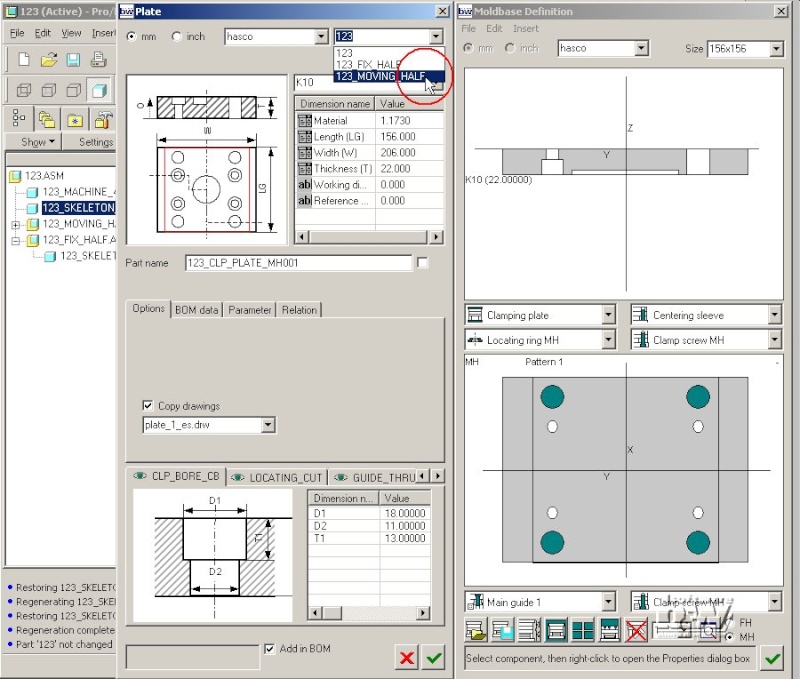
Press in Plate dialog box.
The new K10 plate is assembled as model 123_CLP_PLATE_MH001.PRT to the assembly 123_MOVING_HALF.ASM.
Select Cavity plate from the plate list.
Click the K10 plate in side view.
Select 123_FIX_HALF from the top right list in the Plate dialog box.
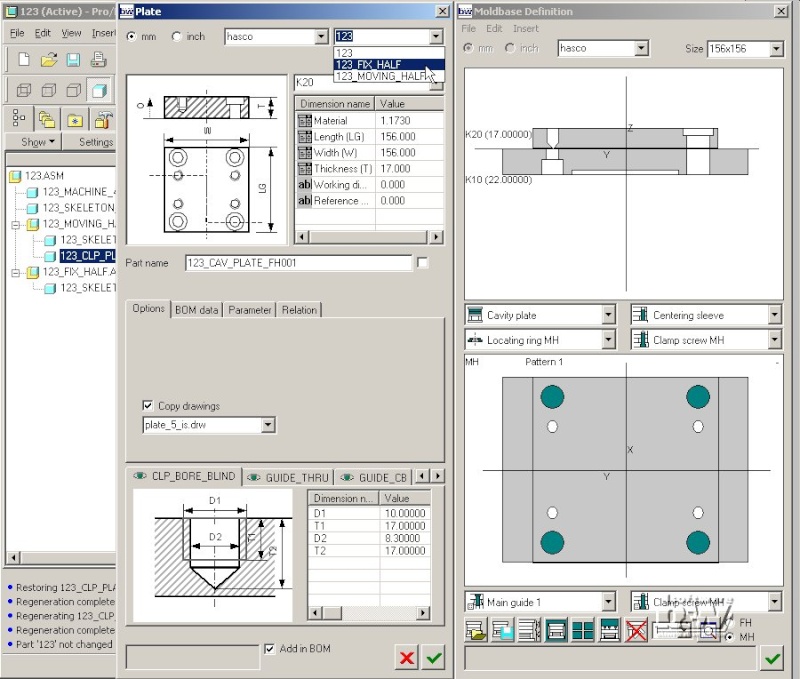
Press in Plate dialog box.
A new K20 plate is assembled as model 123_CAV_PLATE_FH001.PRT to the assembly 123_FIX_HALF.ASM.
Move plate to different subassembly
As long as plates do not have any children in Pro/ENGINEER (any components or features that have references to this plate) it can be moved to other EMX assemblies.
Create a Clamping plate on the fix moldbase half:
Select Clamping plate from the plate list.
Click above the K20 plate in side view.
Select K15 from the plate type list in the Plate dialog box.
Press in Plate dialog box.
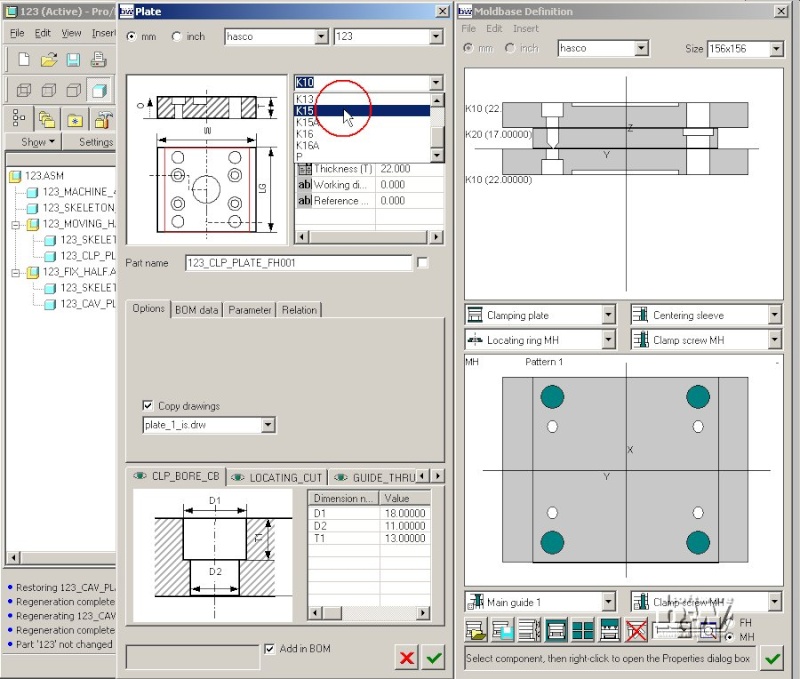
The plate is assembled to the EMX main assembly 123.ASM.
Right click the K15 plate in side view of the Moldbase Definition dialog box.
Select 123_FIX_HALF from the subassembly list.
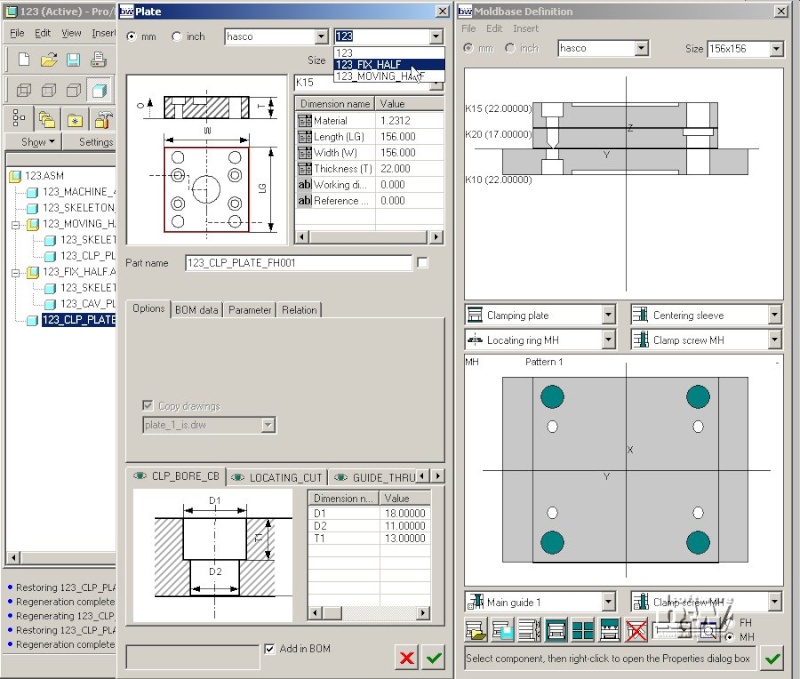
Press in Plate dialog box.
The model 123_CLP_PLATE_FH001 is deleted from the assembly 123.ASM and assembled (using same skeleton references) in the subassembly 123_FIX_HALF.ASM.
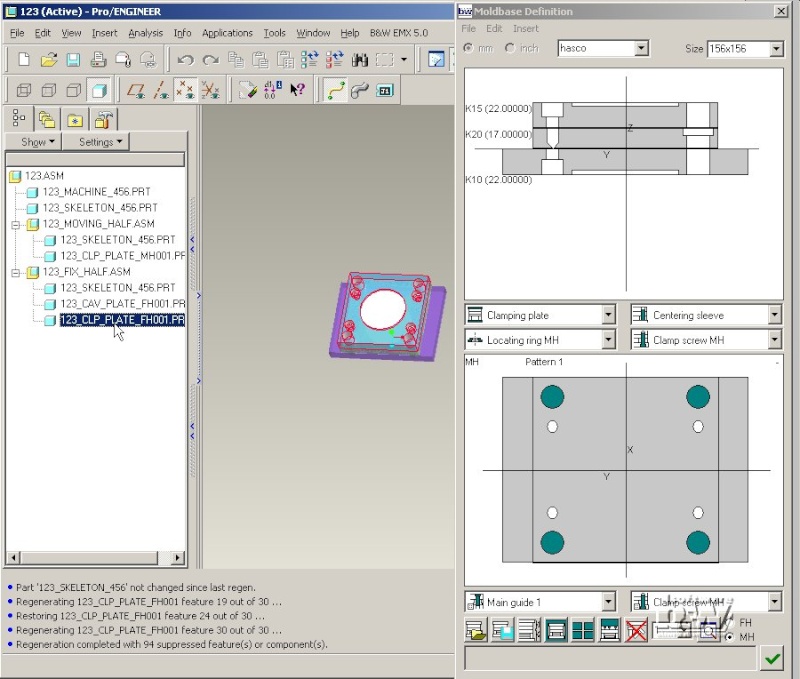
Note: If a plate is used as reference for other components or features the assembly list in the Plate dialog box is deactivated.
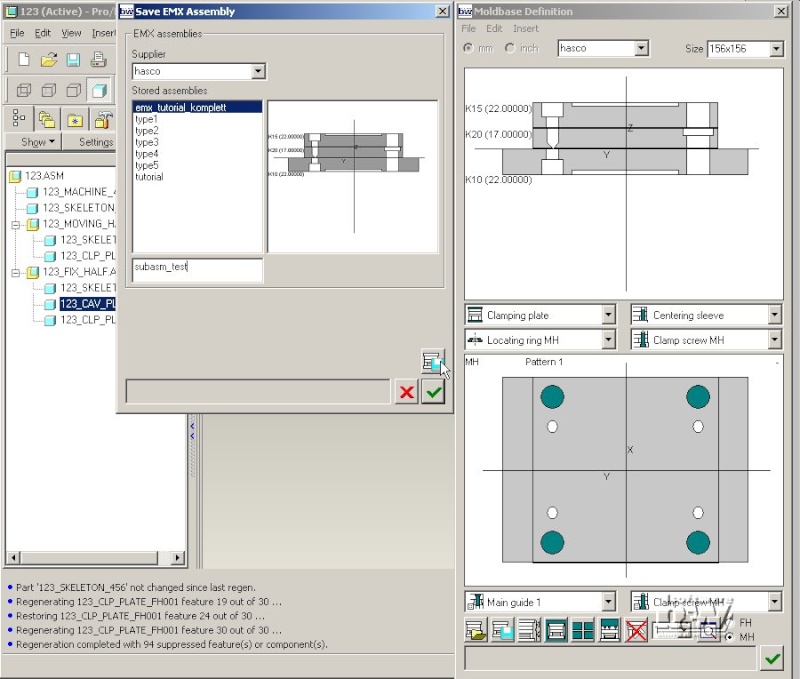
Save an EMX Assembly including its subassembly structure
The information about the subassembly structure of an EMX moldbase assembly is also stored in the EMX Assemblies.
Click in Moldbase Definition.
Enter name subasm_test.
Press in Save EMX Assembly dialog box.
Close the Moldbase Definition dialog box with .
Close the current window with Window > Close.
Erase all models with File > Erase > Not Displayed.
Create a new Project using an EMX assembly including subassemblies
Press EMX > Project > ...create new.
Leave all settings to default and deactivate Copy drawings, Copy reports and Add local project parameters.
Press in Project dialog box.
Select EMX > Mold Base > Assembly Definition.
Click and select the subassembly subasm_test.
Click in Load EMX Assembly dialog box.
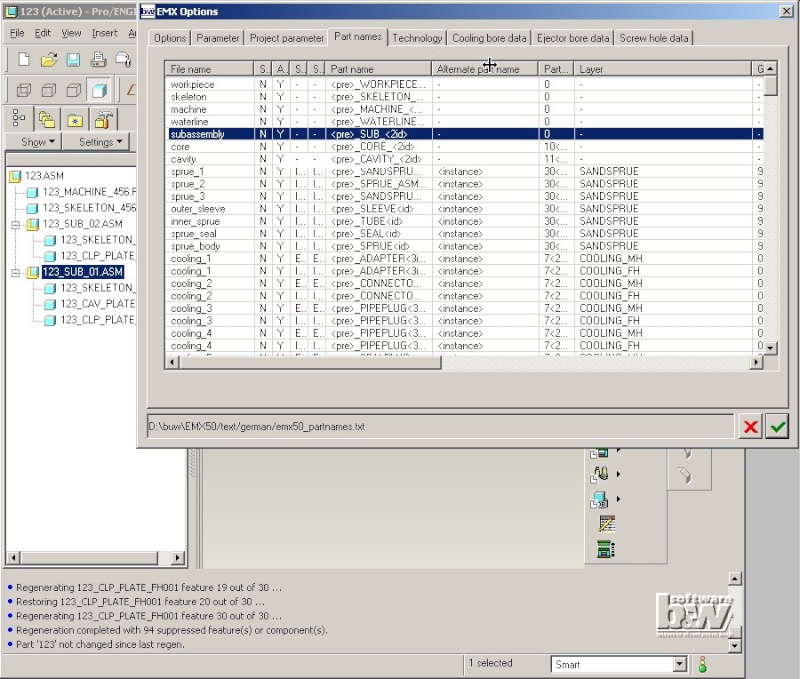
EMX will create all subassemblies and plates. The naming conventions for subassemblies are defined by the EMX Part Names configuration in the subassembly line.